Let’s start by creating our first playbook. When writing YAML files one of the key things to remember is to use spaces not tabs. Some IDEs will translate a click of the tab key to be two spaces instead, but just be aware that it’s not always the case. Ansible is extremely sensitive to this and the majority of your mistakes, whether beginner or veteran, will be because of spacing issues. A good practice is to indent by two spaces when required.
In VSCode, create a new file named, create a file named basics-write_to_file.yml.
In Explorer, right click the ciq-basics folder and select New File:
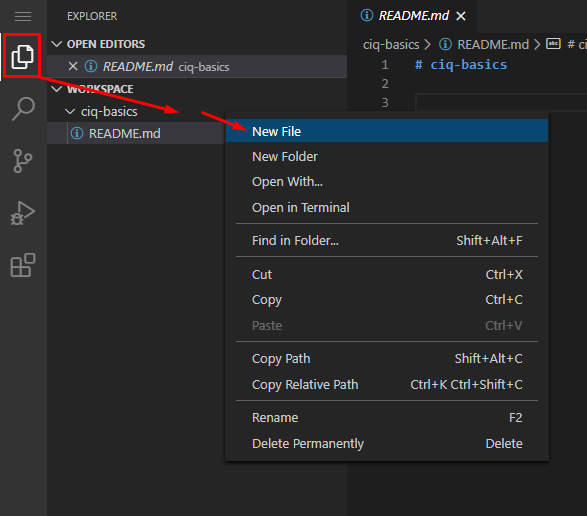
When the new file appears,the name as basics-write_to_file.yml, and hit enter:
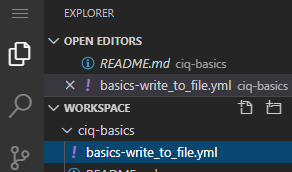
This will open the file editor. Notice that it will keep all of your open files as tabs at the top that you can move between:

Start the newly created file with the following:
---
- name: Write file on localhost
  hosts: basics-host
  gather_facts: false
Playbooks always begin with three dashes.
Next is a - name entry. Here, and in most cases, the name entry is optional, but should be specified. Whenever the playbook runs it will print out the name entries which help with understanding what is happening in this specific portion of the playbook, and if there are any errors, it will specify which host and at what task.
Next comes the hosts portion, and it deserves its own section. I’ll talk about its relationship to inventories.
I’ll start by discussing inventories, which are really just big lists of all the hosts I could possibly operate against. Inventories also, generally, store additional variables for individual hosts or for groups of hosts.
When using Ansible on the command line you will maintain these inventories in simple flat files either in INI or YAML format(it seems INI is the most common type seen).
[web]
web1.ansible.ninja
web2.ansible.ninja

[db]
db1.ansible.ninja
db2.ansible.ninjaweb:
hosts:
web1.ansible.ninja
web2.ansible.ninja
db:
hosts:
db1.ansible.ninja
db2.ansible.ninjaInventories in Ascender are stored directly in the database like so:

Ascender inventories can also be sourced from dynamic inventory scripts, which means Ascender will reach out to some external source like a network monitoring system or ServiceNow’s Configuration Management Database(CMDB), and pull in hosts dynamically so that the inventory will always be up-to-date.
Playbooks have a section called “hosts”. This required option is where you will specify which specific hosts inside of the inventory you want to operate against.
Take for example this playbook for updating packages in Rocky [rocky-update-mixed-lts.yml]. I’ll grab a little snippet from the beginning:
---
- name: Perform package update with LTS support
  hosts: lts_demo
The hosts section consists of a comma separated list of hosts, a comma separated list of groups, or a comma separated combination of both hosts and groups.
A good practice is to simply reference a group or groups when writing playbooks. If you target specific hosts, which is fine from time to time, when you want to change which host to operate against, you have to update your playbook before rerunning your automation. My goal is always to change as few things as possible, and to touch my playbooks only when necessary. If I reference a group, then as hosts get added and removed from the group, I never have to modify my playbook!
---
- name: Write file on localhost
  hosts: basics-host
  gather_facts: false
The hosts selected here will be basics-host. It is a Rocky 9 Virtual Machine (VM) provisioned specifically to test with.
Next I have gather_facts: false set. By default Ansible will attempt to connect to the hosts and gather information about them that is returned in a variablized manner. This info is great for reporting or used when making conditional decisions, but will increase processing time when not needed, which is why I have it turned off.
Let’s finish the playbook. All of the action really happens in the tasks portion of the playbook.
Try adding this to your playbook, and there is no shame in copy/paste, but typing it will get you in the rhythm of spacing things correctly.
  tasks:
    - name: Write file test.txt to the temp folder
      ansible.builtin.lineinfile:
        path: /tmp/test.txt
        line: "just a quick and simple test :)"
        create: yes
The first task above performs a single piece of automation. In this case, it is creating a file using the lineinfile module. Notice that it is using the Fully Qualified Collection Name (FQCN). The format is namespace.collection.module. Next are a few key/value pairs of: path, line, and create. Path specifies where to place the file on the remote host, line supplies what should be added to the file, and last create says “create the file if not present.”
Add the following to your playbook:
    - name: Grab contents of file
      ansible.builtin.shell: cat /tmp/test.txt
      register: file_contents
This task will use the shell module to issue a cat command and save the returned information to a variable named file_contents.
Add this final task to the playbook:
    - name: Display file_contents
      ansible.builtin.debug:
        var: file_contents.stdout_lines
This last task uses the debug module. Debug simply displays things to screen, and I use it constantly. If the purpose of the playbook is to display info or if you are debugging or building, it is equally useful. Here I use the var option to simply dump the contents of a variable out.
Your completed playbook should look like this:
---
- name: Write file on localhost
  hosts: basics-host
  gather_facts: false
  tasks:
    - name: Write file test.txt to the temp folder
      ansible.builtin.lineinfile:
        path: /tmp/test.txt
        line: "just a quick and simple test :)"
        create: yes

    - name: Grab contents of file
      ansible.builtin.shell: cat /tmp/test.txt
      register: file_contents

    - name: Display file_contents
      ansible.builtin.debug:
var: file_contents.stdout_linesSpacing in playbooks have a very specific purpose, which is to show where various parameters are being applied. Take the task below for example:
- name: Set SELinux is set to enforcing
  ansible.builtin.lineinfile:
    path: /etc/selinux/config
    regexp: '^SELINUX='
    line: SELINUX=enforcing
  register: selinux_set
In this example we are using the lineinfile module, which has a few parameters that are specific to it. These parameters(path, regexp, and line) are indented below the module itself. Being indented(two spaces in) directly after the module designates these parameters to be module parameters(options unique to this module).
Also notice in this example that the “register” option is in the same column as the module. This is because it is a task parameter, which means that it applies to the task and not the module specifically.
Most task parameters can be utilized on any task, no matter what module you are using. Module parameters are options that are specific to this module specifically.
Your playbook must be saved in a Source Control Management (SCM) system of some kind. The de-facto standard and one that’s also well supported by Ascender is Git. Again, we are using Gitea, but really, anything that supports git is acceptable. Using VSCode we can now push this playbook to our git repository.
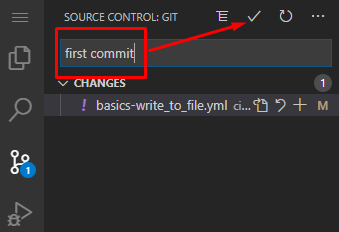
On the left menu, you should see the Source Control button with a small “1” next to it. This indicates we have changes we can push. Click that button to start the push process:

From here you want to add a commit message (what message will be logged to the git server with this push), and click the commit button (looks like a check mark):
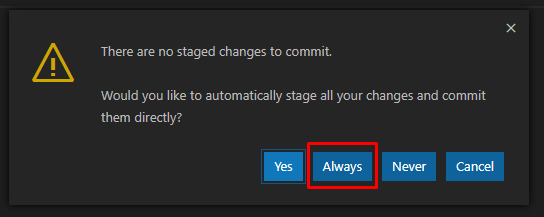
A message will pop up about staged changes. To save ourselves time in the future, click Always:
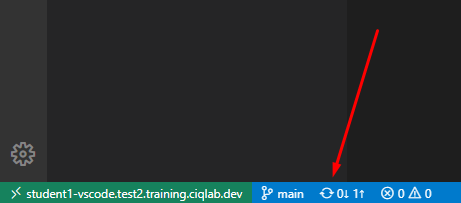
Now, we instruct VSCode to push the changes by clicking more actions and Push or the sync button at the bottom:
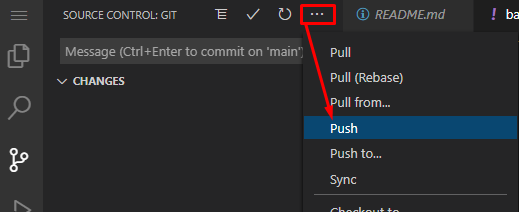
Or
Any time we make a change to a playbook we will need to follow this procedure.
Keep in mind that if you are using a cloud based git repository, do NOT store sensitive information in public facing repositories. Using Ascender you shouldn’t have to store any sensitive information, but during testing it’s often easier to just hard code information. When in doubt, keep your repo private.
Also of note is that you need to switch back to the Explorer menu if you want to create new files or folders!

