While permissions are never the most interesting part of any system, it can often be one of the most important features. Role-based Access Control or RBAC allows you to determine who can do what in the system. This means you can adjust permissions for each part or portion of the system: inventory, credentials, projects, job templates, etc.
This hands-on section is particularly useful for system administrators or team admins that will be adjusting permissions. If, however, you are just a user / consumer of automation, this lab isn’t usually necessary; it never hurts to know how it works, though.
Organizations (orgs) are large silos you can use to contain objects: users, teams, inventories, projects, job templates, credentials. This allows you to segregate, in your environment, who can access what. For example, if you have European and North American divisions that really need to be segregated, you could put them in different organizations. This would prevent them from seeing each other’s resources.
While the default behavior is that one org can’t see another’s resources, a system level administrator has the ability to assign permissions in such a way that multiple orgs can access a single object, this isn’t a “best practice.”
Most organizations stick with the default org named “Default.” That way the network team can easily share job templates with the ops team and vice versa.
There are three types of user in Ascender:
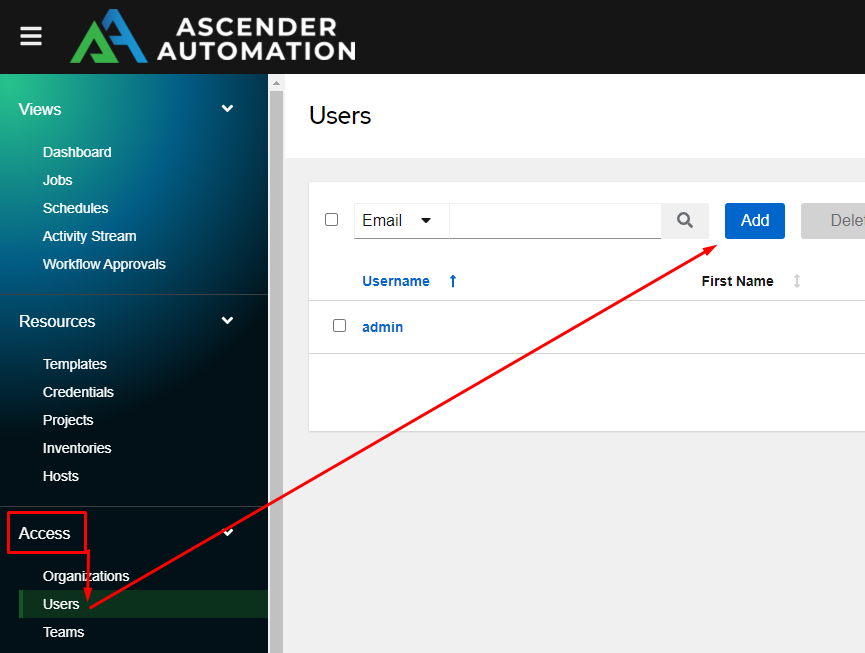
Let’s create a user by going to the Access menu, clicking Users, then click Add:
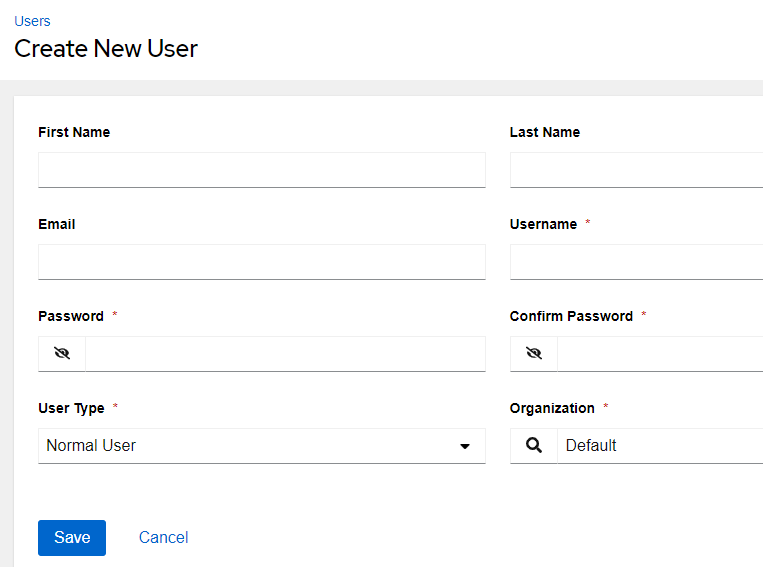
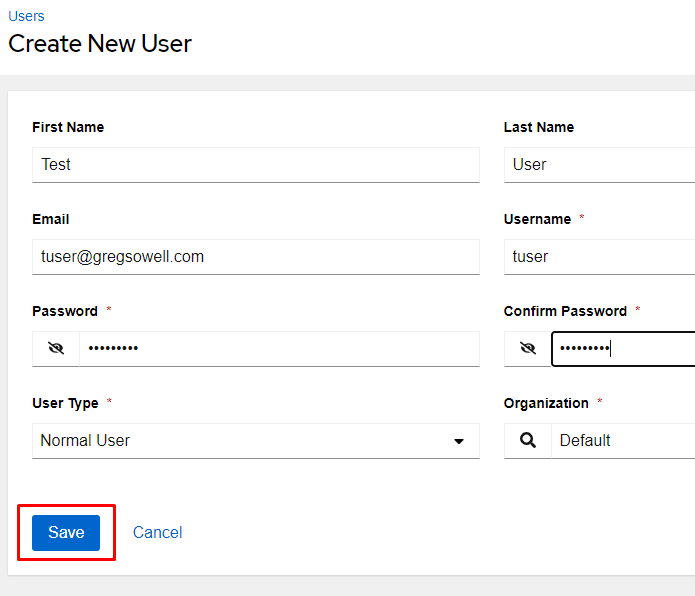
I’ll create a new user with the info as follows, then click Save:
| First Name | Test |
| Last Name | User |
| tuser@example.com | |
| Username | tuser |
| Password | password1 |
| User Type | Normal User |

A team is Ascender’s concept of grouping users. It really allows you to assign permissions (roles) to a team, then as users are added to that team, they will inherit those roles. It is especially useful when an organization gets to more than a few users and/or if you are using an external authentication system for users.
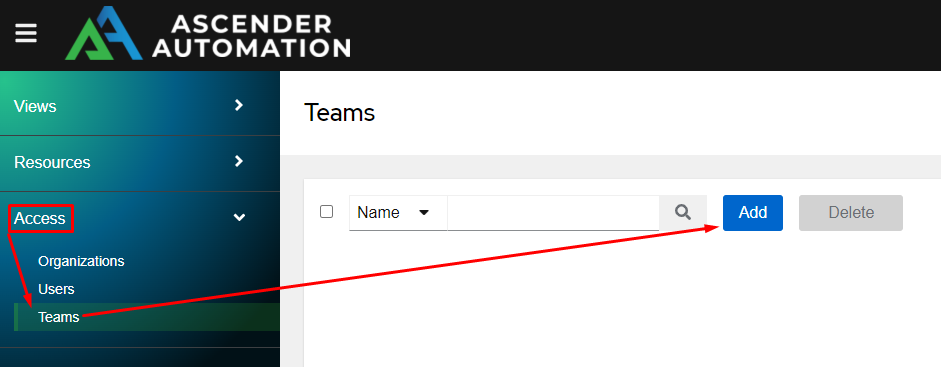
Begin adding a team by clicking on the Access menu, choosing Teams, and clicking Add:
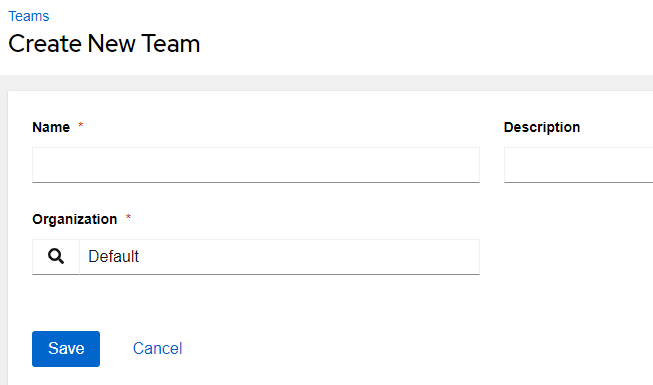
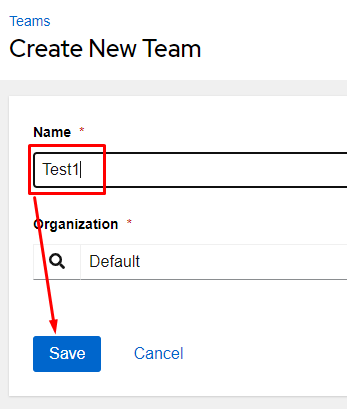
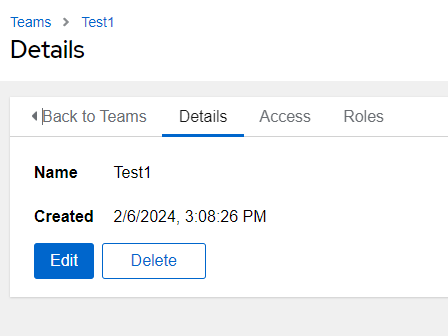
From here we’ll fill in the Name as Test1 and click Save:
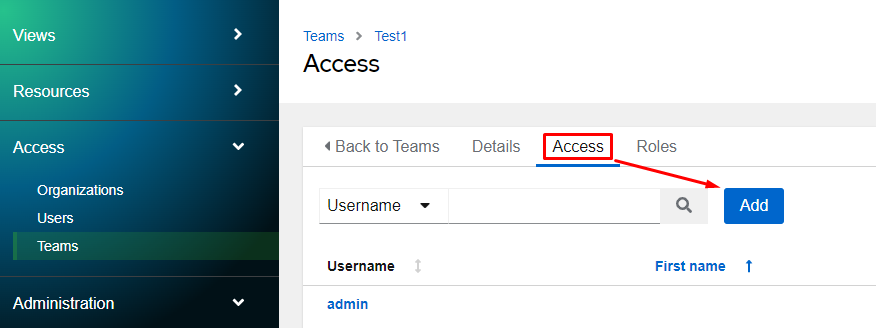
I’ll now add my test user to the group by clicking on the Access tab and clicking Add:
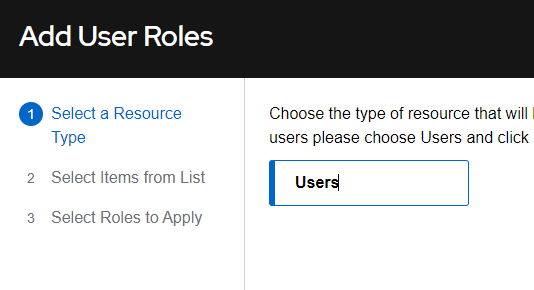
Select Users and click Next:
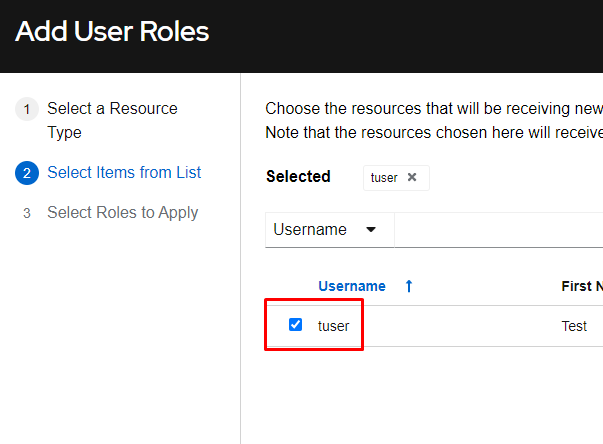
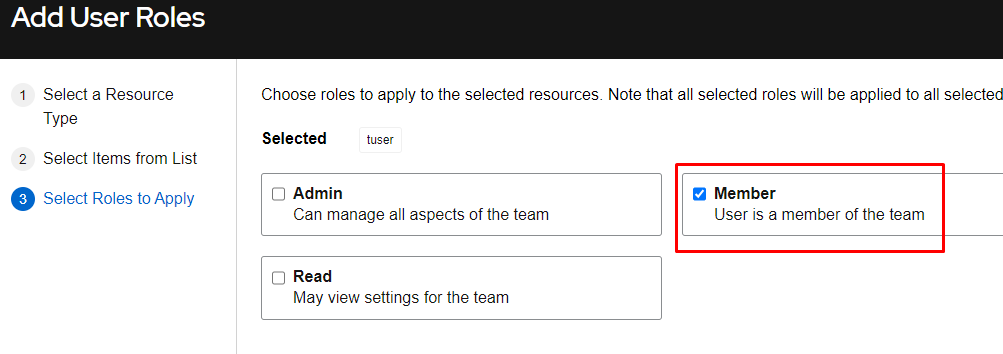
Select tuser and click Next:
Select Member as this is a standard user in this group, and click Save:
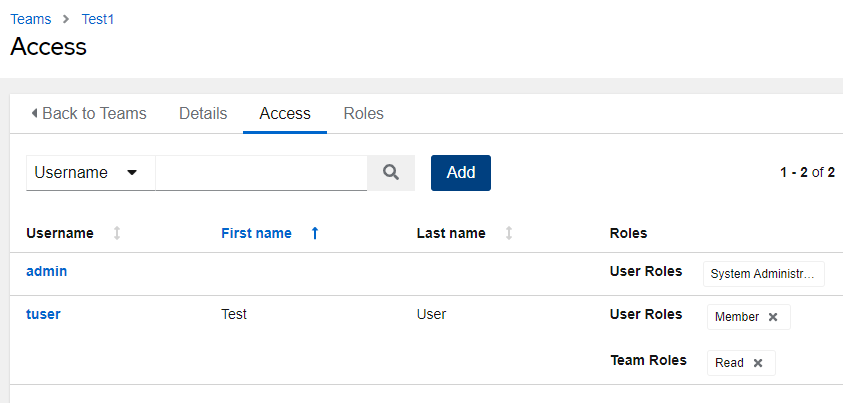
Notice in the above that the admin user is listed here, yet you didn’t add them. That is because the admin user has system admin privileges and has full access to all objects.
Permissions for resources inside of Ascender are assigned right on the resource itself. So if you want to adjust role assignments on an inventory, for example, you would enter the inventory itself and make changes there.
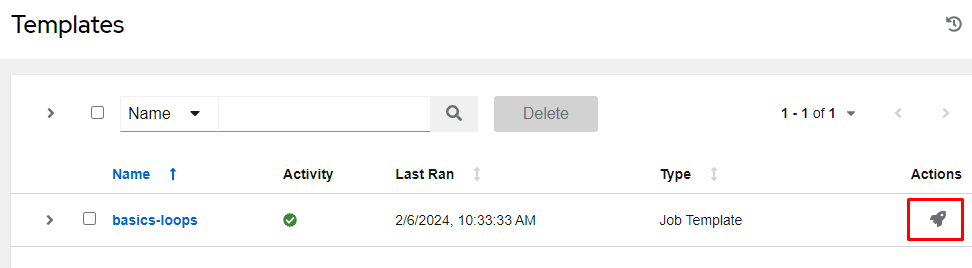
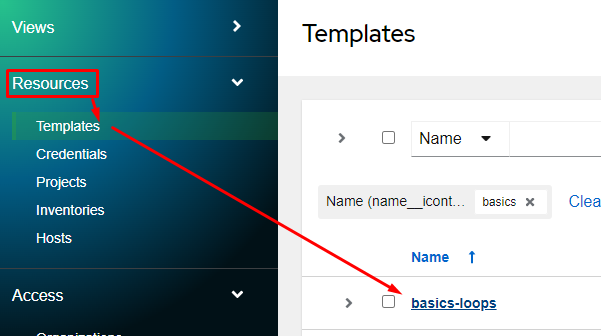
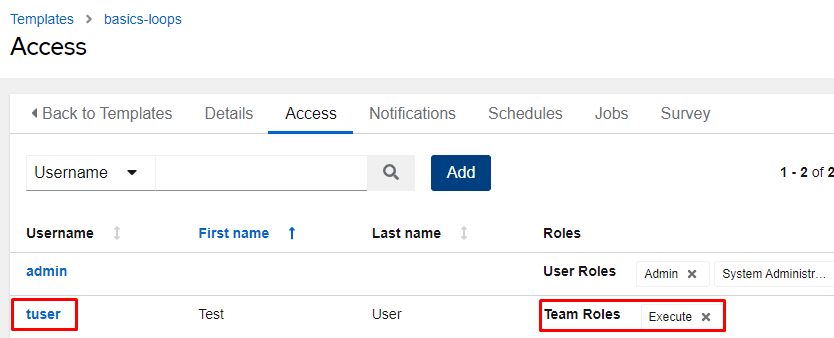
In this example, we’ll give the tuser account execute permissions only on the basics-loops job template. I’ll start by entering the job template with Resources, Templates, click on basics-loops:
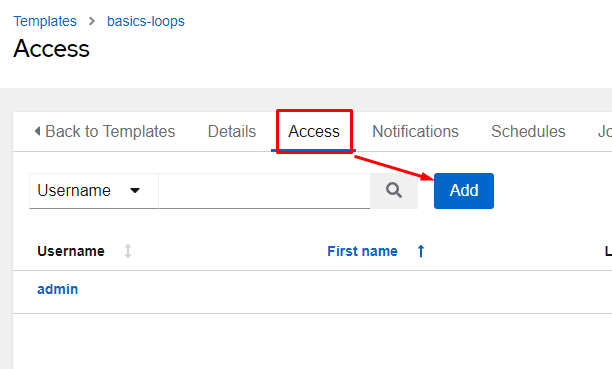
I’ll now click on the Access tab, and then click the Add button:
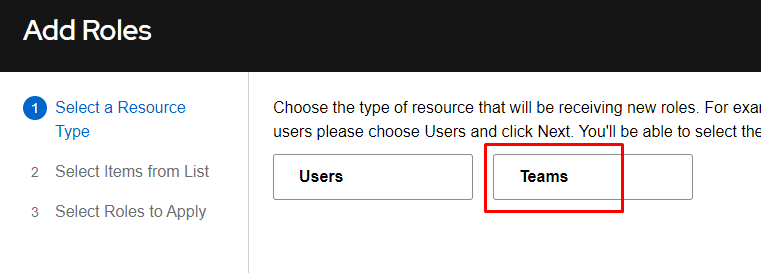
From here I’ll choose Teams and click Next:
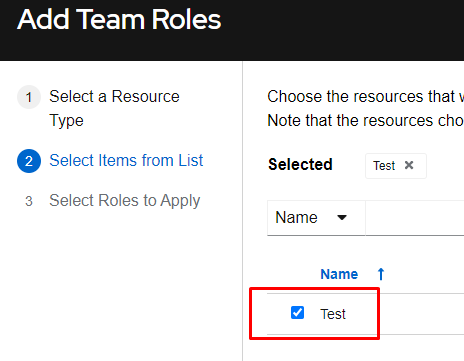
I’ll now choose the Test team we recently created and click Next:
I’ll now select the Execute role and click Save. Again, this will allow the members of the Test group execute only permissions on this job template (no modification or viewing is possible):

Logout of your controller and reconnect as the test user “tuser”:

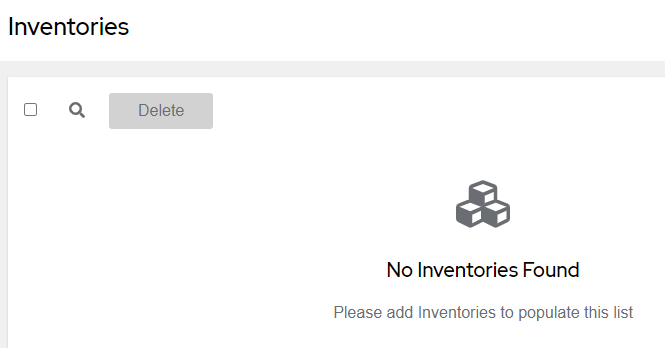
Browse Inventories, Projects, and Credentials. You’ll notice they are all empty as we aren’t assigned a role that allows us to view any of those objects:
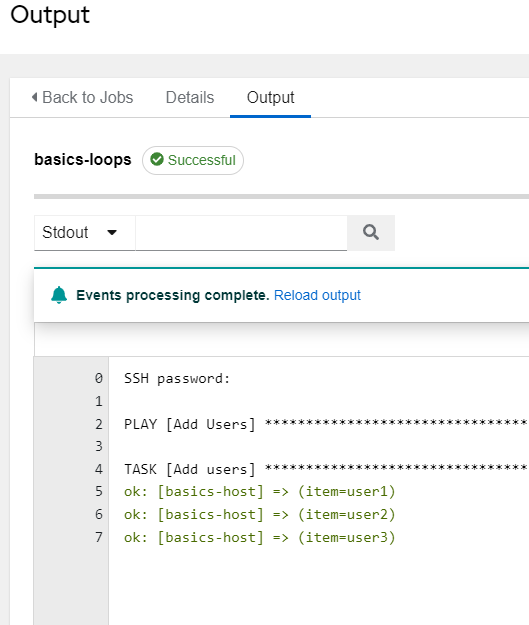
If, however, you browse to the Templates section you will see the basics-loop job ready for us to launch. Click the rocket ship next to it to ensure you can execute it: